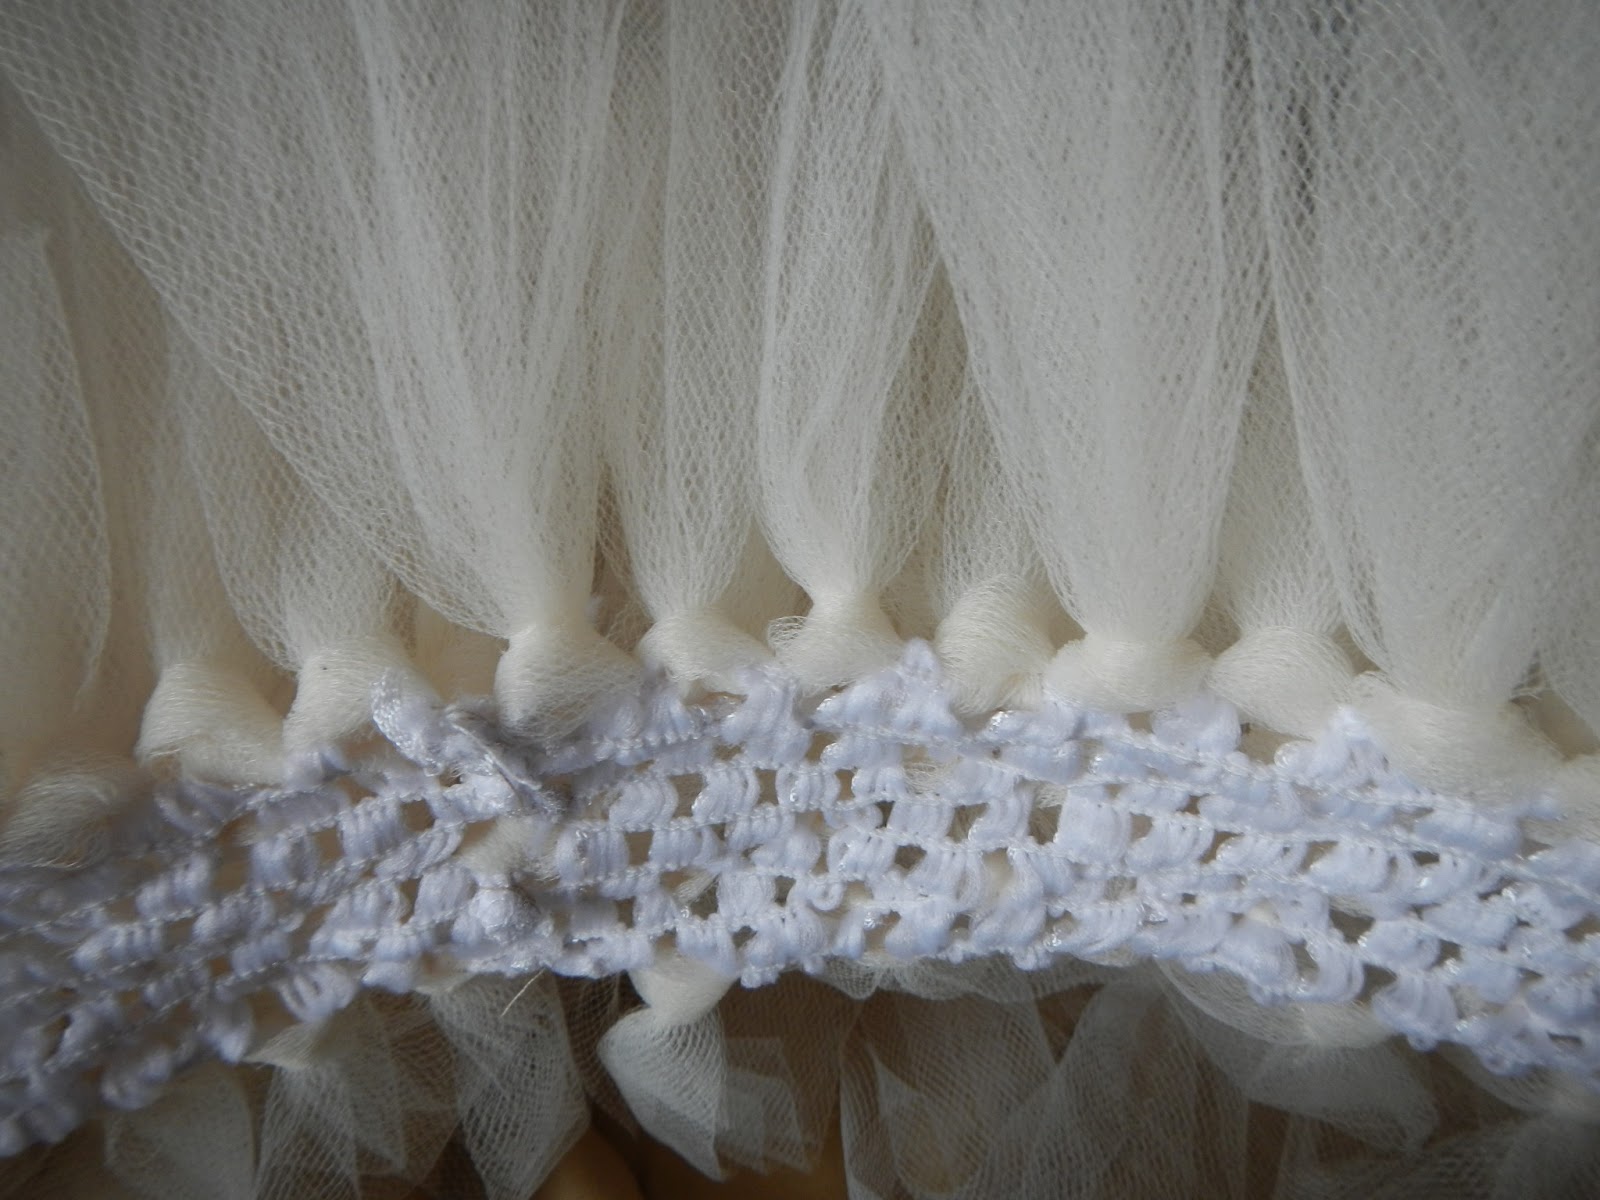
I found the tulle online. The waistband I used was from a local fabric store, and is actually two crocheted headbands (like you'd use for babies) cut and hand-stitched together to form one long strip.

The tulle I cut about 7-8 feet long (it depends on how long you want it, really. But you'll fold it in half so keep in mind the actual length will be half of what you cut) and roughly 6 inches wide. I recommend cutting it about 6 inches longer than you think you're going to need. Tulle clings to itself and if you're going to be outside or walking around with it, it will shorten itself a bit.

I attached the tulle strips to the waistband by folding the tulle strip in half (the long way), looping the halfway mark through the waistband, and pulling the ends through the loop, and pulling tight. But not too tight... it's just a skirt, after all. ;)

I attached the tulle in random places, somewhat evenly spaced out, and finished the very top with random shorter bits of tulle.

The top strips ranged from 10 inches to two feet and hid the waistband really well.

You could add a ribbon "belt" around the top if you wanted, but I didn't. Lastly, finish the skirt by sewing hooks on one side so the skirt is adjustable for whoever wears it.
In all, It took me about 4 hours to do. And I used about 30 yards of tulle. I wanted it big and poofy (and since it's ivory colored I wanted to be able to hide the legs underneath) but you can add more or less as you like. I hope this helps!
The skirt in action:


Great tutorial. Do you have an after in the action shot we could see? Thanks :)
ReplyDeleteYes please! Lets see the finished product! :)
ReplyDeleteGreat idea to use headbands for the waist! Bookmarked now and I'll share as an alternate method when I get my tutorial done.
ReplyDelete